Accurate Installation & Sizing is a critical defense against failed building inspections and costly job site modifications. Relying on a single rough opening measurement often results in ordering frames that bind or fail strict egress codes, destroying your project margins through expensive reordering delays and warranty callbacks.
This analysis benchmarks proper replacement techniques against the 5.7 square foot egress standard required by the International Residential Code. We evaluate essential metrics like quarter-inch squareness tolerances and hinge handing designations to help you secure full compliance and prevent structural hardware failures.
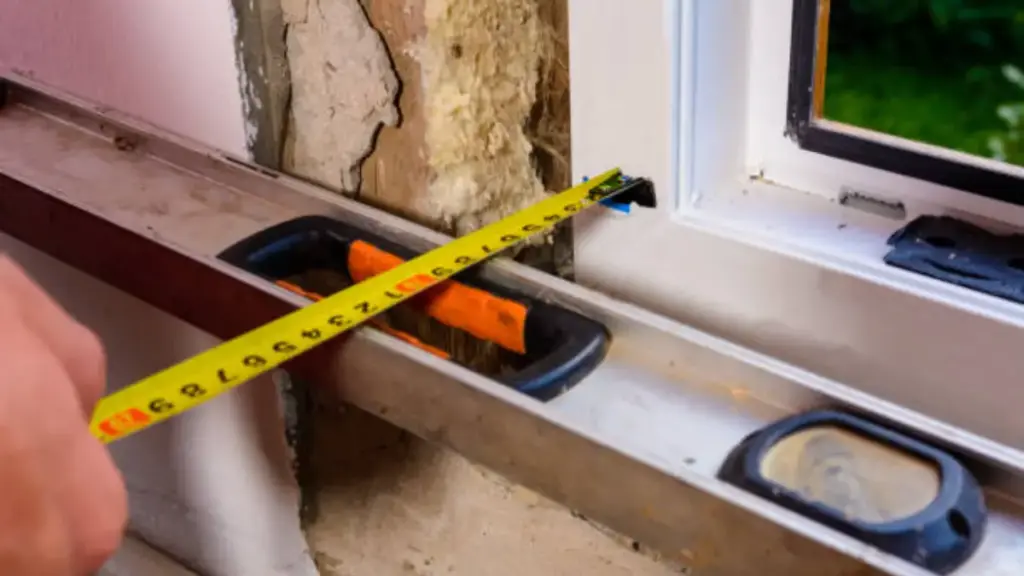
How to Measure a Casement Window for Replacement?
Accurate replacement requires measuring width and height at three points, taking the smallest value, verifying a 3-1/4 inch depth, and confirming frame squareness within 1/4 인치.
| 차원 | Measurement Points | Selection Rule |
|---|---|---|
| 너비 | 맨 위, Middle, Bottom (between side jambs) | Record the smallest number |
| 키 | Left, Center, Right (sill to top) | Record the smallest number |
| Depth | Interior stop to exterior stop | Verify at least 3-1/4 inches space |
| Squareness | Diagonally from opposite corners | Difference must stay under 1/4 인치 |
Recording Width, 키, and Depth
Securing an exact fit for a replacement unit requires taking multiple readings across the existing opening. Older window frames often settle or bow over time, making a single measurement unreliable.
- 너비: Measure the distance between the side jambs at the top, 가운데, and bottom of the window opening. Keep the smallest number to ensure the new frame slides in without binding.
- 키: Measure from the highest point of the sill up to the top of the opening at the left, 센터, 그리고 오른쪽. Record the smallest value.
- Depth: Measure the distance between the interior stop and the exterior stop. Verify you have at least 3-1/4 inches of space to accommodate the replacement frame.
Verifying Squareness and Documenting Units
A perfectly sized window will still fail during installation if the rough opening is severely out of square. Installers must check the frame alignment before sending final specifications to the manufacturer.
- Check Squareness: Measure diagonally from the top left corner to the bottom right corner, and then from the top right to the bottom left. Make sure the difference between the two diagonal measurements stays under 1/4 인치.
- Format Specifications: Document all final measurements in millimeters to eliminate fraction rounding errors. Note the exact positions of any mullions to ensure precise manufacturing for custom aluminum replacement windows.
Submitting standardized, precise data directly prevents job site modifications, protects energy efficiency performance, and eliminates costly reordering delays.
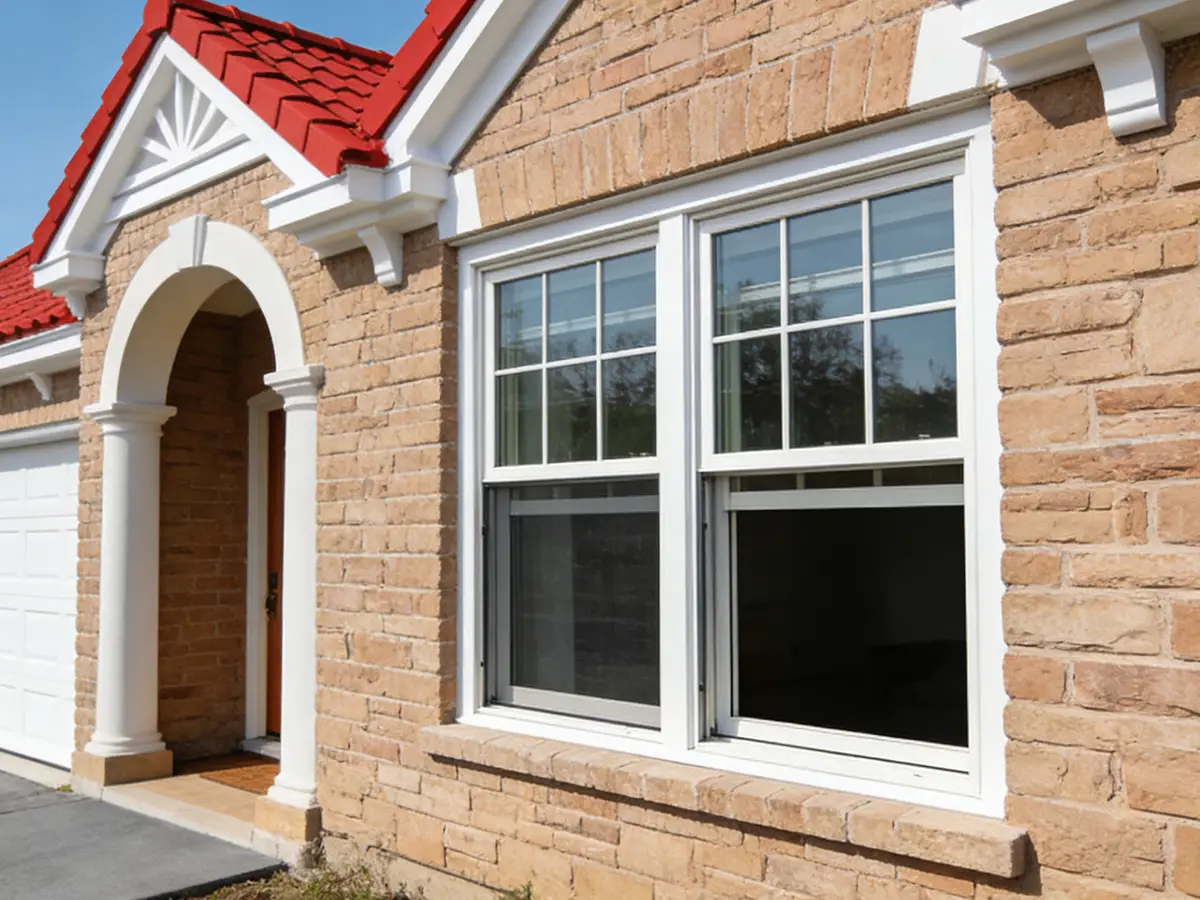
Egress Window Size Requirements for Safety
Building codes mandate egress windows have a minimum 20-inch width, 24-inch height, 그리고 5.7 square foot clear opening to guarantee safe emergency exits and first responder access.
Minimum Opening Dimensions
The International Residential Code establishes strict baseline dimensions for emergency escape and rescue openings. Installers must measure the actual clear space available when the window is fully open, rather than the exterior frame dimensions.
- Minimum Width: 20 신장
- Minimum Height: 24 신장
- Clear Opening Area (Upper Floors): 5.7 평방피트
- Clear Opening Area (Ground Level): 5.0 평방피트
- Maximum Sill Height: 44 inches from the finished floor
A window must meet both the height and width minimums while simultaneously achieving the total square footage requirement. Passing just one metric fails the code.
Basement Well Clearances and Operability Standards
Below-ground installations require structural window wells to guarantee a functional escape route. Building codes enforce exact specifications for these exterior spaces alongside standard hardware and environmental requirements.
- Window Well Area: Minimum 9 평방피트
- Well Dimensions: 적어도 36 inches in both width and length
- Deep Well Access: Wells deeper than 44 inches require permanent steps or an attached ladder with rungs spaced no more than 18 인치 간격
- 자연광: Window glass must cover at least 8% of the total room floor area
- 통풍: The opening must provide natural ventilation equal to at least 4% of the room floor area
Occupants must be able to open the window fully from the inside during an emergency. Hardware that requires tools, keys, or special knowledge to operate violates building code and creates a severe safety hazard.
High-Performance Aluminum Windows for Global Projects
Can a Casement Window Be Installed Horizontally?
Manufacturers engineer casement windows for vertical operation. Installing them horizontally compromises hinge mechanics, ruins weather sealing, and voids structural safety. Choose purpose-built horizontal alternatives instead.
Mechanical Limitations of Horizontal Placement
Casement window hinges support the sash weight vertically from the side. When you turn the window sideways, you completely alter its center of gravity. This places excessive stress on operating mechanisms that manufacturers never rated for horizontal loads.
Beyond hardware failures, a horizontal orientation disrupts the built-in drainage paths of the frame. Gravity will force water to pool and infiltrate the system, bypassing the weather seals and causing long-term structural damage to the window cavity.
Recommended Alternatives for Horizontal Openings
If your project requires a wide opening, specify window systems built for that exact geometry rather than modifying vertical units. You have two primary options:
- 천막 창: These serve as the correct mechanical equivalent for horizontal spaces. They utilize top hinges specifically engineered to handle upward lifting and distribute weight correctly.
- 슬라이딩 창: Series like the 120, TS5, and TS6 offer practical, space-saving applications built specifically to accommodate horizontal width without straining the hardware.
Consult directly with the manufacturer before finalizing your specifications. They will help you select a custom system style that fits your opening while maintaining strict sound insulation and thermal performance standards.
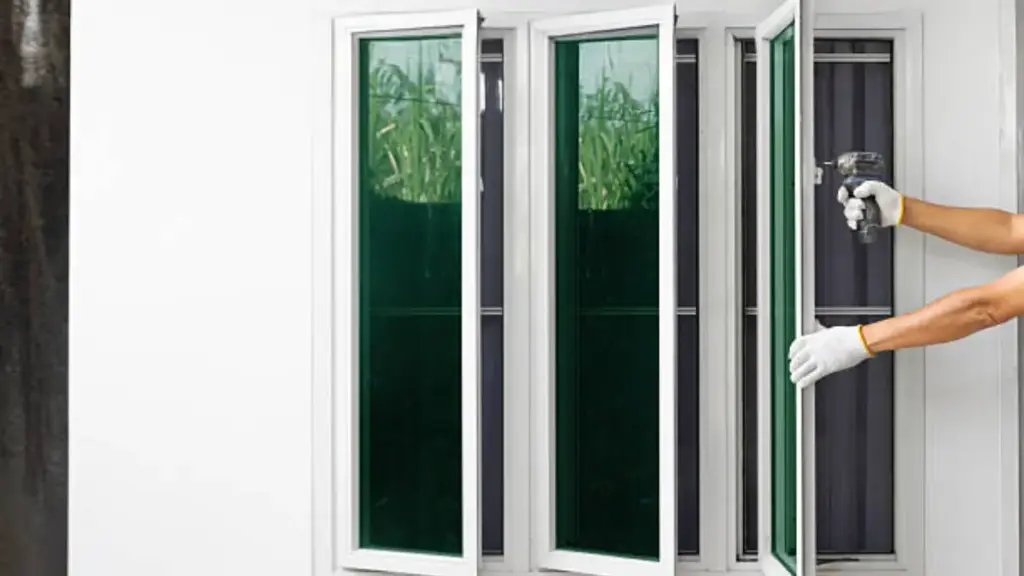
Where Are the Hinges Placed on a Casement Window?
Installers mount casement hinges on the side frames. Outward-opening designs use exterior hinges positioned near the top and bottom corners, while taller sashes require additional center support for stability.
Horizontal and Vertical Hinge 포지셔닝
Outward-opening casement windows feature hinges mounted directly on the exterior frame. This hardware placement allows the sash to swing outward freely without obstruction.
Vertically, installers space the hinges evenly along the window height. They secure the top and bottom hinges just a few inches from the corners to anchor the sash effectively. Taller residential and commercial window sashes require three or more hinges to ensure structural stability, support the extra glass weight, and prevent the frame from sagging over time.
Handing Designations and Structural Alignment
Industry standards label casement windows based on their exterior hinge location. Manufacturers designate these units as FCL (From the Curb Left) or FCR (From the Curb Right). This orientation dictates exactly how the window operates within the opening.
When dealing with side-by-side installations, you must position the hinges on the outer edges. This setup ensures the paired sashes open outward from the center like double doors, maximizing airflow and structural clearance.
Precise hardware alignment during the installation phase prevents long-term stress on heavy-duty aluminum frames. Correctly leveling and shimming the hinges guarantees proper weight distribution across the entire window system.
Which Way Should Casement Windows Open (Left vs. Right)?
Casement windows usually open outward. You select left-hand or right-hand hinges based on your dominant hand, room airflow targets, and paired window aesthetics.
Left-Hand and Right-Hand Configurations
Industry professionals determine window handing by looking at the unit from the outside of the building. This exterior viewpoint establishes a universal reference point for manufacturing and installation.
- Left-handed (FCL): The factory mounts the hinges on the left side of the frame, causing the sash to open toward the left.
- Right-handed (FCR): The factory mounts the hinges on the right side of the frame, causing the sash to open toward the right.
Beyond left- and right-hand configurations, crank-out and push-out casement windows should be considered together, as their operating methods directly affect how the sash opens and how users interact with the window, leading to noticeably different opening behavior and installation requirements.
Practical Factors for Choosing Hinge Placement
Selecting the correct hinge placement dictates daily operation and room airflow. You must evaluate three functional elements before finalizing your window order.
- Dominant hand alignment: Match the window crank orientation to your dominant hand. This reduces wrist strain and allows users to operate the hardware with minimal effort.
- Cross-ventilation targets: Position FCR and FCL windows on opposite walls of a room. This layout catches exterior breezes from multiple angles and forces stagnant air out of the interior space.
- Paired installations: Install one FCL and one FCR unit side by side when grouping windows. This forces the sashes to open outward from the center like double doors, preventing a situation where both windows swing the exact same direction and block sightlines.
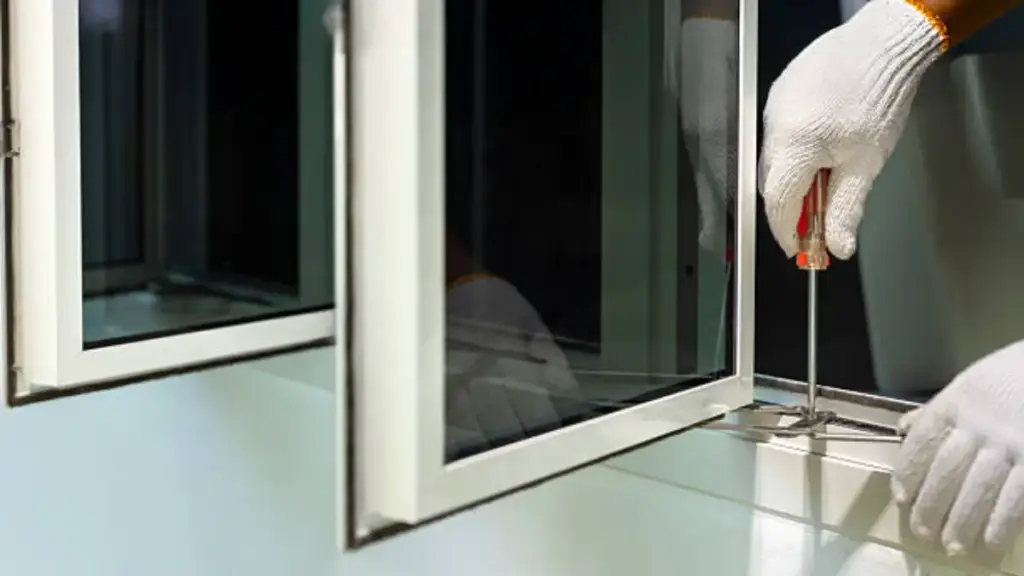
Step-by-Step Installation for Aluminum Frames

Aluminum frame installation centers on precise assembly, strategic shimming, and sequential anchoring. Following manufacturer specifications ensures structural integrity, weather resistance, and warranty compliance.
Standard Process for Frame Assembly and Anchoring
Proper installation requires a systematic approach to prevent distortion and guarantee a flush fit. Field teams follow a strict sequence to lock the frame squarely into the rough opening.
- 프레임 어셈블리: Connect the vertical jambs to the horizontal head extrusion. Make sure all corners sit flush and tight before lifting the unit into place.
- Strategic Shimming: Insert cedar wood shims behind every single anchor point. This maintains squareness and prevents the aluminum extrusion from bowing when you drive the fasteners.
- Sequential Anchoring: Drill and secure anchors one by one with a maximum spacing of 24 신장. Run tape strings diagonally across opposite corners to verify alignment constantly as you work.
Factory-Prepped Systems and Technical Support
Modern commercial installations rely on pre-fabrication to speed up site work and eliminate human error. Manufacturers engineer these systems so your crew spends time assembling rather than cutting.
- Zero Field Cutting: Installers use pre-notched and pre-drilled profiles direct from integrated manufacturing facilities. This prevents messy on-site modifications and protects the factory finish.
- Load Compliance: Crews apply specific technical guidance from manufacturers like OPUOMEN. This exact engineering data ensures the frame withstands local climate conditions and required wind loads.
- Quality Validation: Project managers validate the final assembly against ISO9001 structural integrity standards. Passing this validation verifies proper mechanical function and activates the 5-year product warranty.
How to Find a Window Manufacturer with Installation Support
Prioritize manufacturers with proven installation track records, integrated service models, dual product and labor warranties, and dedicated technical support to ensure long-term performance.
Core Selection Criteria for Manufacturer Support
When sourcing window manufacturers, look past the product specifications and examine their operational capabilities. A reliable partner brings substantial installation history and clearly documented methodologies for initial site surveys. This groundwork prevents costly structural modifications and project delays.
Look for companies that offer integrated service packages. You want a single point of responsibility that handles the entire project pipeline. Key offerings should include:
- Design consultations: Pre-planning for accurate sizing and material selection.
- 전문적인 설치: Factory-trained teams executing the fitment.
- Debris management: Complete removal of old frames and construction waste.
- Finished trim work: Final sealing and aesthetic completion.
Warranty Standards and Technical Guidance Requirements
A manufacturer’s warranty framework directly reflects their confidence in their installation teams. Demand dual protection that covers both the physical product and the installation labor. A standard benchmark is a long-term product guarantee paired with at least a 5-year project warranty for the labor itself.
Verify the manufacturer operates under recognized quality control frameworks and provides robust post-purchase infrastructure:
- Quality control: ISO9001 certification for consistent manufacturing reliability.
- Technical guidance: Direct technical support for complex on-site installations.
- After-sales support: Dedicated teams to address post-installation concerns.
This post-installation support remains critical for resolving operational challenges, mitigating condensation risks, or addressing structural issues like frame warping before they escalate into major failures.
최종 생각
While generic window suppliers offer lower upfront costs, partnering with an ISO9001-certified manufacturer like opuo is the only way to safeguard your margins against costly job site modifications and egress code failures. Factory-prepped aluminum systems eliminate installation guesswork and protect your business from long-term structural claims. Delivering precision-engineered, code-compliant inventory builds permanent trust with your clients.
Stop risking your project timelines on unverified materials. We recommend starting with a sample cross-section of our pre-drilled aluminum extrusions to test the fitment and finish firsthand. Contact our technical team today to discuss your specific sizing limits and integrated manufacturing needs.
자주 묻는 질문
How do you measure casement windows for replacement?
To get exact replacement dimensions, take measurements at three points for both width and height to account for framing irregularities.
- 너비: Measure between the side jambs at the top, 가운데, 그리고 바닥. Record the smallest number.
- 키: Measure from the sill to the top of the opening on the left, 센터, 그리고 오른쪽. Use the smallest figure.
- Depth: Measure the frame from the inside face of the interior stop to the inside face of the exterior stop. Industry standards dictate a minimum of 3-1/4 inches for a proper fit.
- Squareness: Measure diagonally from opposite corners. If the numbers differ by more than 1/4 인치, you will need to adjust your width measurement.
What are the egress size requirements for casement windows?
Building codes like the IBC and IRC enforce strict egress requirements to ensure emergency escape access. A window must meet every single minimum listed below, 하나만이 아니라.
- Clear Opening Area: 5.7 square feet for above-ground windows, 또는 5.0 square feet for grade-level units.
- Opening Height: Minimum 24 신장.
- Opening Width: Minimum 20 신장.
- Sill Height: Maximum 44 완성된 바닥에서 인치 위.
Basement applications require a window well with at least 9 square feet of horizontal area and a minimum dimension of 36 inches for both width and depth.
Do casement windows open inward or outward?
Opening direction depends heavily on your geographic region and specific application needs.
- North American Standard (Outward): Most casement windows in the US and Canada swing outward. This design catches cross-breezes effectively, prevents rain intrusion when open, and keeps the interior wall space clear for furniture and blinds.
- European Standard (Inward): European markets favor inward-opening casements, commonly engineered as tilt-and-turn windows. These allow you to fully open the window inward for cleaning or tilt the top inward for secure ventilation.
How can I tell if a casement window is left-handed or right-handed?
Window manufacturers determine handing by the hinge location when you view the window from the exterior of the building.
- Left-Handed (FCL): From the outside, the hinges sit on the left side. The window swings to the left.
- Right-Handed (FCR): From the outside, the hinges sit on the right side. The window swings to the right.
If you stand inside the room, you can check the locking mechanism. If the lock sits on the left side of the frame, you have a left-handed unit. The location of the crank handle does not dictate the handing orientation.
Can you install a casement window sideways?
You should never install a casement window sideways. Manufacturers engineer casement window hardware, 경첩, and weatherstripping exclusively for vertical operation.
Rotating the unit 90 degrees breaks the intended mechanical function. The weight distribution will strip the hinges, the weather seals will fail to block wind, and the built-in weep holes will trap water inside the frame instead of draining it outward. Always install casement windows in their designated upright orientation.
What are the standard heights for casement windows?
Casement windows do not follow a single universal height. Manufacturers produce them in standard ranges that vary slightly by region.
- 미국: Heights typically range from 17 에게 73 신장. Manufacturers scale the sizes in 6-inch increments starting from a 48-inch baseline.
- 캐나다: Building standards require a minimum height of 18 inches and cap the maximum height at 78 inches to prevent the sash weight from failing the hardware.
Common standard heights include 24, 36, 48, 60, 그리고 72 신장. Because the window swings outward from a side hinge, casement designs are structurally taller than they are wide.